Reverse Engineering - Transforming an IoT device's firmware into a filesystem
Summary
Nowadays, IoT - Internet of Things - is a term that is increasingly present in the world of technology. As the technology develops, the security risks also increase.
Firmware is software that’s embedded in a piece of hardware. You can think of firmware simply as “software for hardware.” However, it’s not an interchangeable term for software.
By getting access to a device’s firmware, we can disclose it’s filesystem. Tools like binwalk and dd can help us to do that extraction.
As a result, by having access to the filesystem, we can browser through the files and executables, search for vulnerabilities in the source code, reverse engineer the main components of the device’s software, etc.
There are many types of filesystems, like SQUASHFS, EXT and JFFS2, and they can be compressed using, for example, LZMA or CPIO.
Step 1 - Get the Firmware
First of all, you need to have access to a firmware. You can get one in the manufacter’s website, or by extracting it through a UART, by finding the “serial console” (VGRT) in the hardware board.
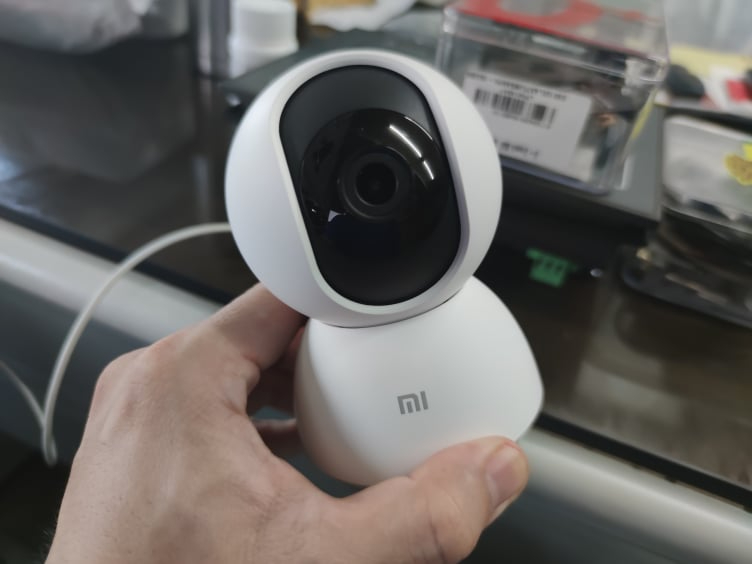
In this tutorial, we will be using the XIAOMI Mi Home Security 360° FHD 1080p security camera:

I found this post, which contains the firmware for the refered device.
I downloaded and unzipped the file.
$ unzip firmware.zip
$ ls
'guide to follow it.txt'   guiformat-x64.Exe   tf_recovery.img
Above, we can see that the compressed file came with 3 files: a text file, an executable and an image file.
What we want to look at is the image file, since the text file cannot contain a filesystem, and the executable is only a helper to recover the device firmware.
Step 2 - Gather information about the image file
First of all, let’s check what’s the file type, by running the file command:
$ file tf_recovery.img
tf_recovery.img: u-boot legacy uImage, MVX2##I3g60b5603KL_LX318####[BR:\3757zXZ, Linux/ARM, OS Kernel Image (lzma), 1724412 bytes, Wed Jun  6 07:02:07 2018, Load Address: 0x20008000, Entry Point: 0x20008000, Header CRC: 0x5799CFC3, Data CRC: 0x2FF27A1D
The returned response tells us it is a u-boot legacy uImage, containing a kernel image.
We can use a tool called binwalk, which is a “tool for searching binary images for embedded files and executable code”, as the manual page says.
$ binwalk tf_recovery.img

DECIMAL       HEXADECIMAL     DESCRIPTION
--------------------------------------------------------------------------------
64            0x40            xz compressed data
2162688       0x210000        Squashfs filesystem, little endian, version 4.0, compression:xz, size: 6502290 bytes, 2019 inodes, blocksize: 131072 bytes, created: 2018-06-06 07:02:05
9830400       0x960000        JFFS2 filesystem, little endian
As we can see above, binwalk revealed 3 files embedded in the image file. 2 of them are filesystems: a Squashfs and JFFS2.
Journalling Flash File System version 2 or JFFS2 is a log-structured file system for use with flash memory devices. JFFS2 has been included into the Linux kernel and is also available for a few bootloaders.
Squashfs is a compressed read-only file system for Linux, which compresses files, inodes and directories.
Step 3 - Extract the filesystems
Let’s extract the two filesystems. We can use binwalk or dd for that.
$ binwalk -Me tf_recovery.img
$ ls _tf_recovery.img.extracted
210000.squashfs  40  40.xz  960000.jffs2  jffs2-root  squashfs-root
$ ls jffs2-root/fs_1/ squashfs-root/
jffs2-root/fs_1/:
bin  data  etc  lib  sound

squashfs-root/:
bin  data  default.prop  dev  etc  lib  lib32  linuxrc  media  mnt  opt  proc  root  run  sbin  sys  tmp  ueventd.rc  usr  var
The extraction also decompressed the compressed filesystems (210000.squashfs and 960000.jffs2), which generated jffs2-root and squashfs-root folders.
If we wanted to extract, for example, only the jffs2 filesystem, we can use dd to carve out the jffs2 file, and a tool called jefferson to decompress the jffs2 file to a folder:
$ dd if=tf_recovery.img bs=1 skip=9830400 of=filesystem.jffs2
$ jefferson filesystem.jffs2 -d filesystem
$ ls filesystem/fs_1
bin  data  etc  lib  sound
With the dd command, we specified that we wanted a Block Size of 1 and we wanted to skip 9830400 bytes of content, since the JFFS2 file starts at that point, as seen in the previous binwalk command (binwalk tf_recovery.img). The output of the extraction should be called filesystem.jffs2
Step 4 - Explore
This is when the real fun begins, where you explore the system, reverse engineer the binaries that make the device work, etc.
Note that this is static analysis, not dynamic. You don’t have access to the running processes of the device. You’ll have to be creative and patient while exploring this type of filesystem.
If you want to explore a running filesystem from this (or another) device, you’ll have to use UART to get a shell, if you have access to an account (pray for root). There are a few tutorials on how to do that, from Flashback team and from 15/85 Security. Here are a few videos for that: Hacker’s Guide to UART Root Shells and Intro to Hardware Reversing: Finding a UART and getting a shell.
Now that we have access to the device filesystem, we can start exploring!
References
mitch002 “Mi Home Security Camera 360 Unbrick Method for MJSXJ05CM Model” [Jun. 9, 2020]
Pedro Ribeiro & Radek Domanski - Flashback Team “Hacker’s Guide to UART Root Shells” [Jan. 21, 2021]
Rbrei (Wikipedia) “SquashFS” [May 4, 2021]
Stefan Viehböck (sviehb) “Jefferson” [Oct. 15, 2020]
Tim Fisher “What Is Firmware?” [May 25, 2021]
Tony Gambacorta “Reversing Firmware - How does that work?” [Mar. 8, 2017]
Tony Sidaway (Wikipedia) “JFFS2” [May 15, 2021]